This article will review how to use the HyFlex classroom technology. Please refer to the Teaching in a HyFlex Classroom support article for additional HyFlex teaching tips and best practices.
TABLE OF CONTENTS
- Getting Started
- The ViewSonic Display
- The Logitech Camera & Remote
- Sharing Content (whiteboard, presentations, videos, etc.)
Getting Started
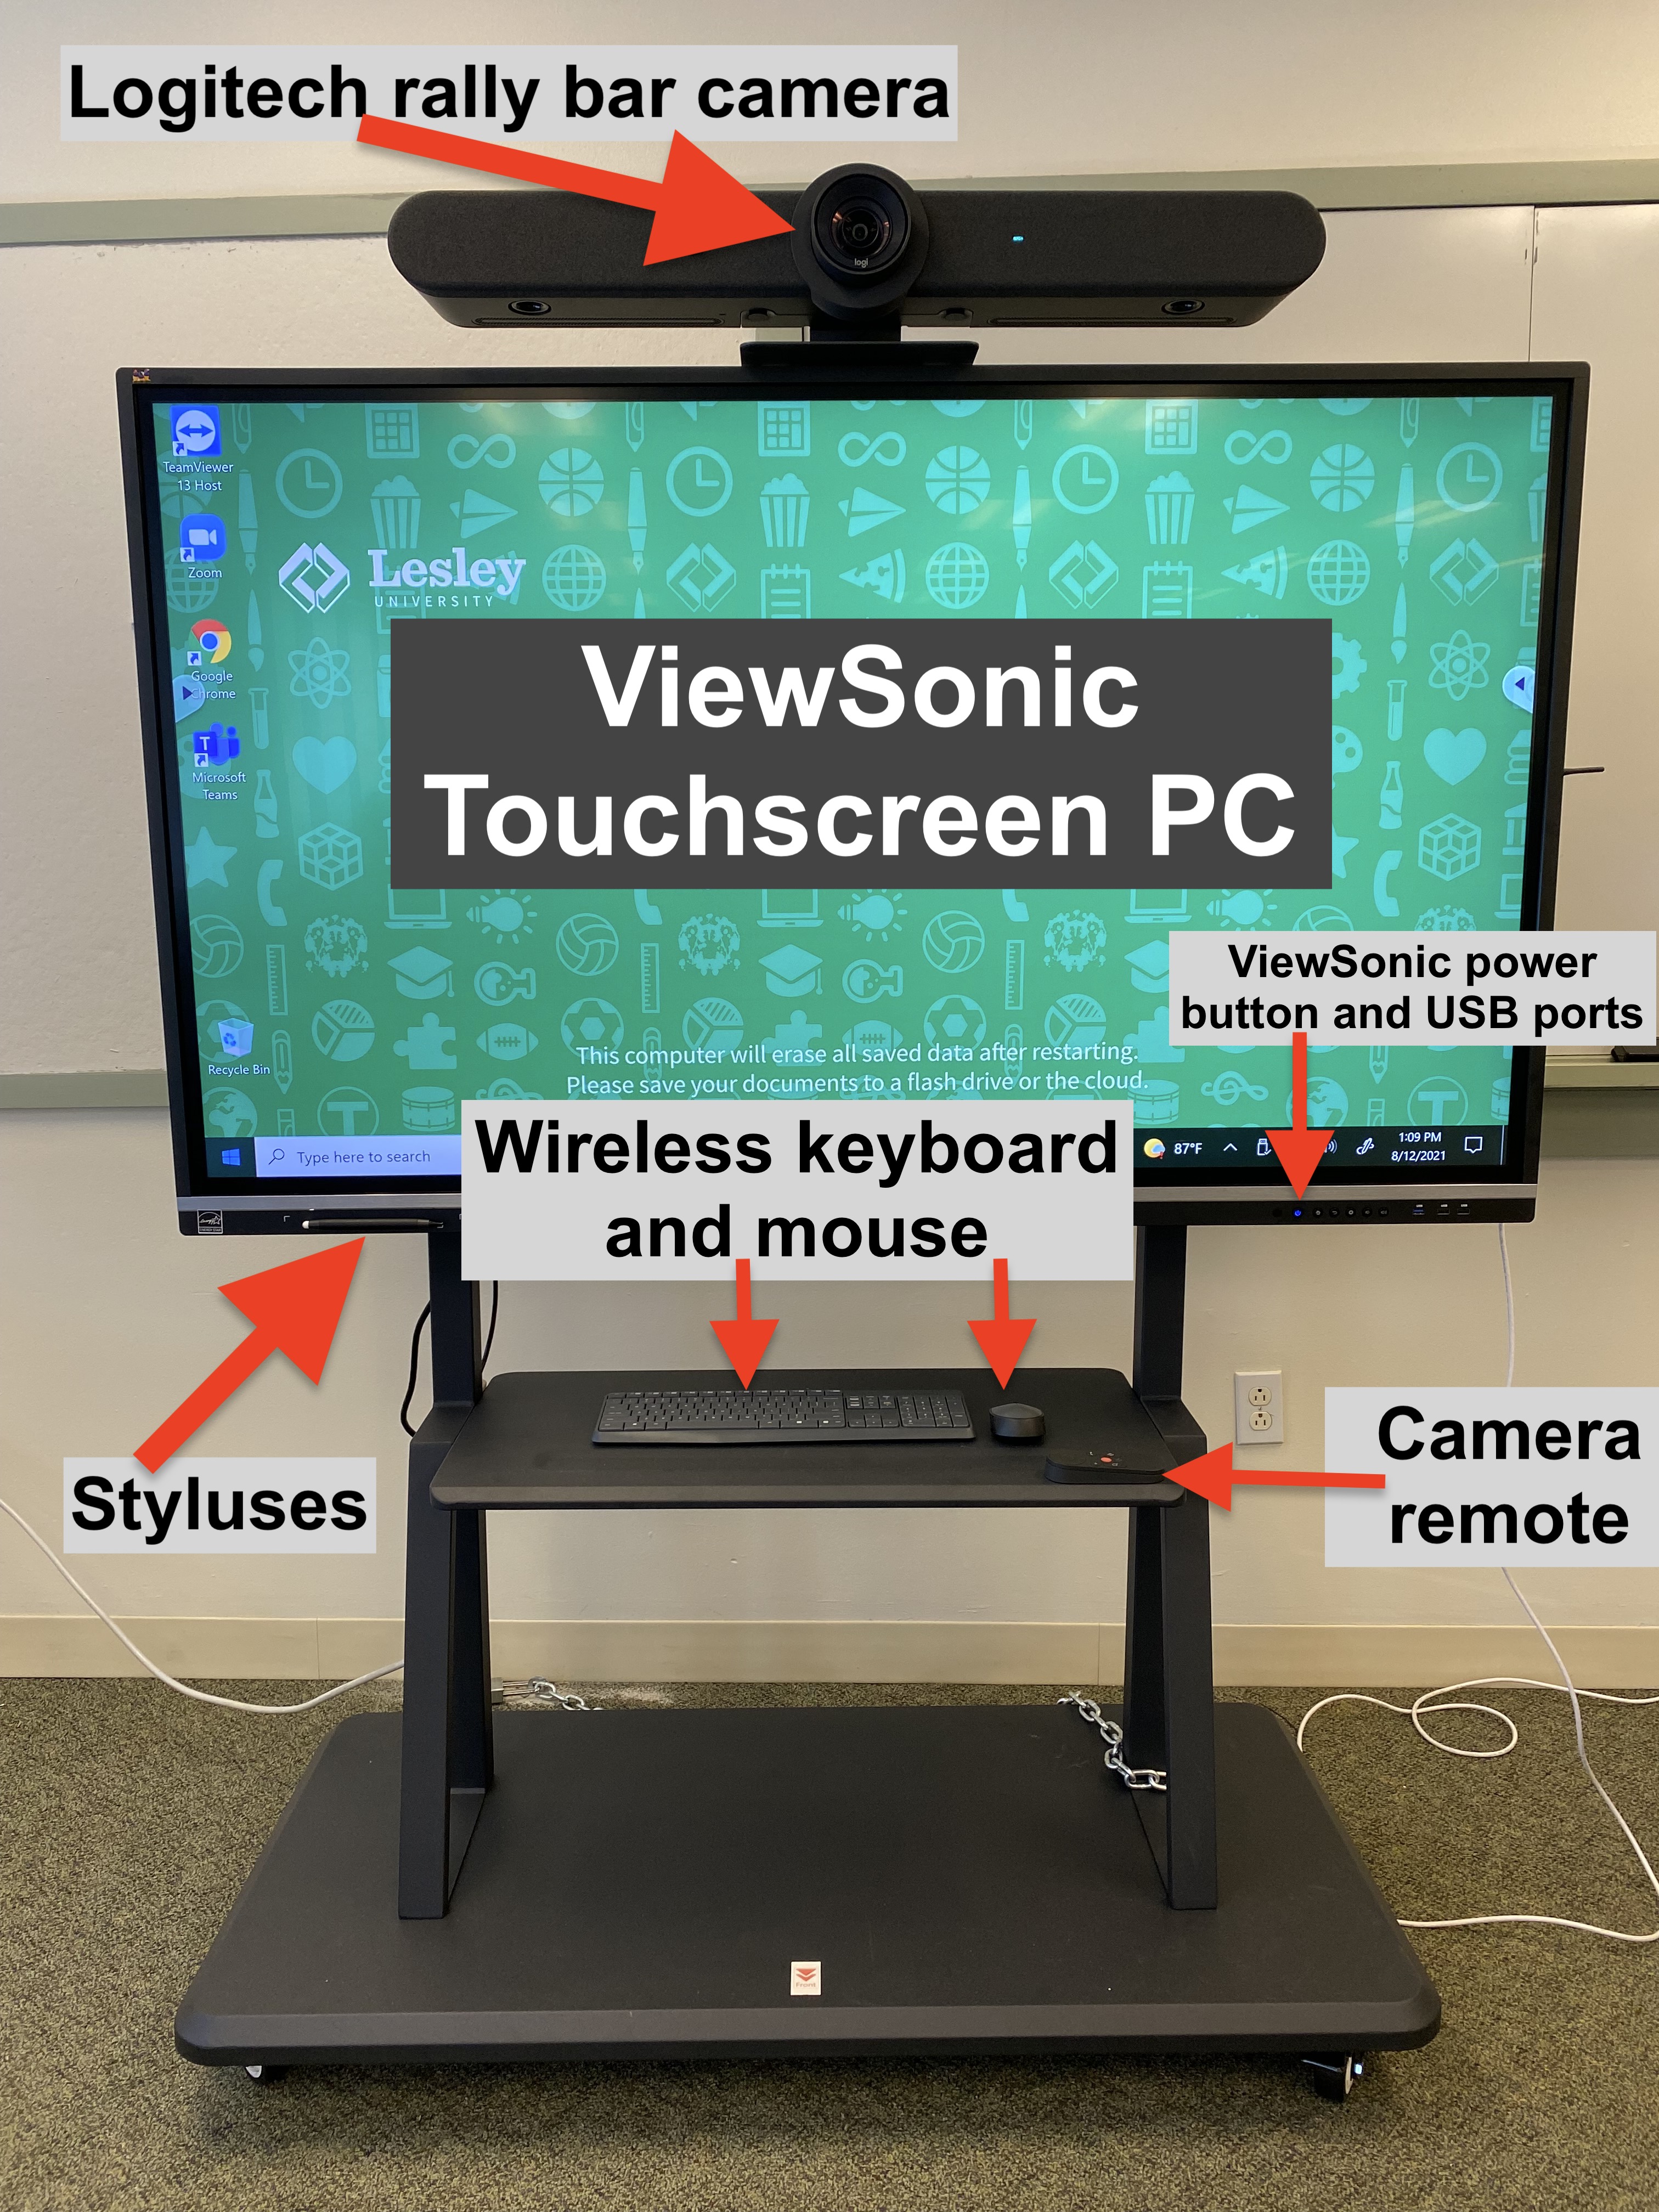
The equipment in the HyFlex classrooms consists of a Logitech rally bar camera on top of a large touchscreen PC, a wireless keyboard, a wireless mouse, a remote for the rally bar, and two styluses for use on the touchscreen.
Turn on the system
When you first walk into the classroom, turn the system on by pressing the Power button on the bottom of the display. It will take a few minutes for the system to boot up.

Locate the Accessories
As the system is booting, locate the wireless keyboard and mouse, as you will need these for navigating the system and logging into your accounts. Make sure the Logitech remote and styluses are available if you plan to use them.

Please note that the mouse has an on/off switch on the bottom. Make sure the mouse is turned on before using it. If the batteries are dead, please contact IT.
Log in to Zoom
Once the system has booted up, click on the Zoom icon on the desktop or taskbar to open Zoom.
Once Zoom opens, click the SSO button to log in to Zoom via SSO.

Once you have logged into Zoom with your Lesley credentials, open your Zoom meeting. This will allow your virtual students to attend class.
Important Note About Multi-Factor Authentication
Remember to bring your mobile phone! When you log into your Lesley accounts you will need to verify your identity using Office 365 multi-factor authentication. If you do not have your authenticator preferences set up to go to your mobile phone (instead of your home or office phone), you may change your multi-factor authentication settings.
The ViewSonic Display
The ViewSonic Display is essentially a large touch screen computer. You can log in and navigate the system much like you would with any PC. The system has many of the essential software tools that you may need for your teaching, including Zoom, Chrome, Microsoft Office, and more.
This computer will erase all saved data after restarting. Please save your documents to a USB flash drive or to cloud storage (such as OneDrive or Google Drive).
The Logitech Camera & Remote
The Logitech rally bar is the camera on top of the display and is the default audio and video source. Depending on your classroom, the camera will pick up most of the room and the microphones are sensitive enough to pick up your voice in the back of the room.
The camera has a tracking feature, which will auto track you and your voice up to 12 ft. Anything further and you will need to use the remote to pan and zoom to the desired spot.

Sharing Content (whiteboard, presentations, videos, etc.)
In order to ensure that both your in-class students and your online students can view the content you will want to ensure that you share your content digitally.
Share a Whiteboard
The simplest way to share a whiteboard with your students is to use Zoom's built-in whiteboard. Then you can use the stylus (or your finger) on the ViewSonic to write or draw on the digital whiteboard.
Share Presentations and Documents
To share a presentation or document, share your screen in Zoom. This will ensure that all your students can view your content regardless of their location.
You may opt to share a file that you saved to your laptop, cloud storage, or a USB flash drive:
- Share a file from your laptop: If you saved your presentation or document on your laptop, log in to Zoom from your laptop (don't log out of Zoom on the ViewSonic display). Then open your file and share your screen in Zoom.
- Share a file from a USB flash drive: If you saved your presentation or document to a USB flash drive, you may insert your drive into one of the USB ports on the front of the ViewSonic display. Locate your file, open it, and share your screen in Zoom.

- Share a file from cloud storage: If you saved your presentation or document to cloud storage such as OneDrive or Google Drive, you can login to your account on the ViewSonic display, open your file, then share your screen in Zoom.
Share Videos
In order to show videos in class, share your screen in Zoom. When you share your screen, be sure to select the option at the bottom of the screen to share sound.
- Share digital media: In order to share digital media (including YouTube, Vimeo, library video resources, Kaltura videos, etc.), open your video on your computer, and share your screen in Zoom.

- Share physical media (DVD): In order to share a DVD, you will need to ensure that you have a laptop with a DVD player, or you can connect one to your computer. Open the video on your computer, login to Zoom from your laptop (don't log out of Zoom on the ViewSonic display) and share your screen in Zoom.
Was this article helpful?
That’s Great!
Thank you for your feedback
Sorry! We couldn't be helpful
Thank you for your feedback
Feedback sent
We appreciate your effort and will try to fix the article