Submitting I-9
This job aid provides new student employees with step-by-step instructions on completing their Form I-9.
Submitting the Form I-9
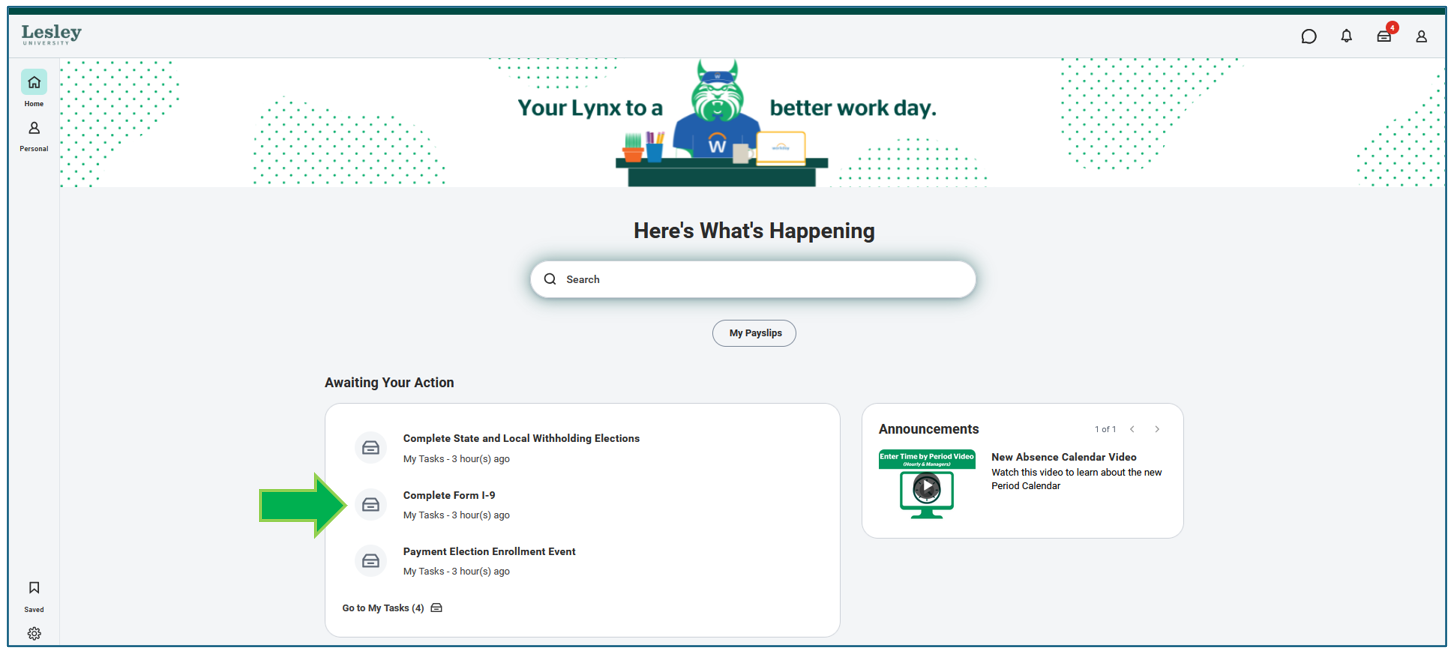
From your Workday homepage, under Awaiting Your Action. If the task to complete your Form I-9 does not show as your first three items, click Go to All Inbox Items (#). You will be directed to your Workday Inbox where all your tasks needing to be completed will be shown.
Click on the Complete Form I-9 task. When clicking, you will find the form on the right-hand side of your screen where you can complete it right from your inbox.
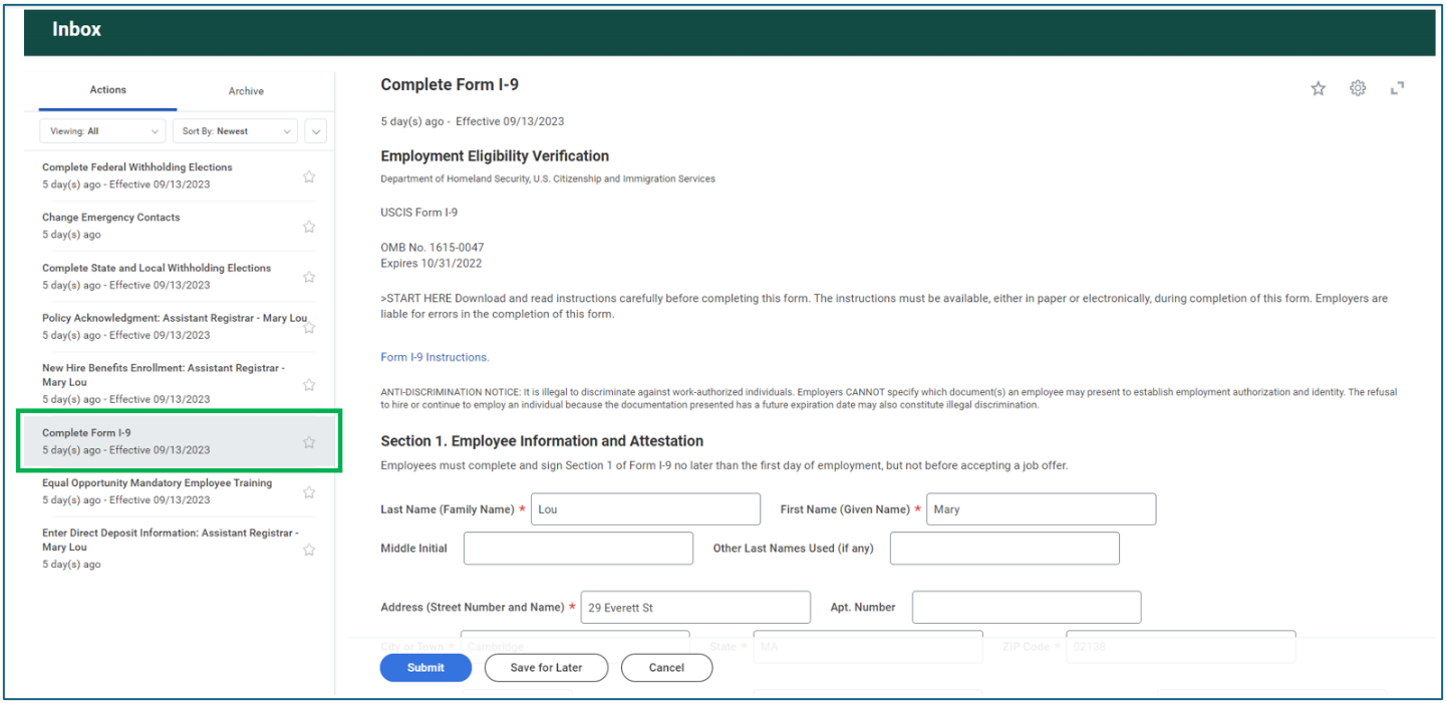

Complete Section 1 of the I-9 Form. All fields marked with a red asterisk are required fields.
The 1st section would be for the colleague to complete. You will fill out personal information such as:
- First and Last Name
- Middle Initial or Other Last Names Used (if any)
- Address
- Date of Birth
- Social Security Number
- Email Address
- Phone Number
You will then checkoff your Applicable Status such as:
- U.S. Citizen
- A noncitizen
- A lawful permanent resident
- An alien authorized to work.
Signature of Employee:
Be sure to check off the box I Agree acknowledging you have read the attestation statement and you are signing this I-9 form.
Under Preparer and/or Translator Certification, choose the appropriate selection.
- I did not use a preparer or translator
- A preparer(s) and/or translator(s) assisted the employee in completing Section 1.

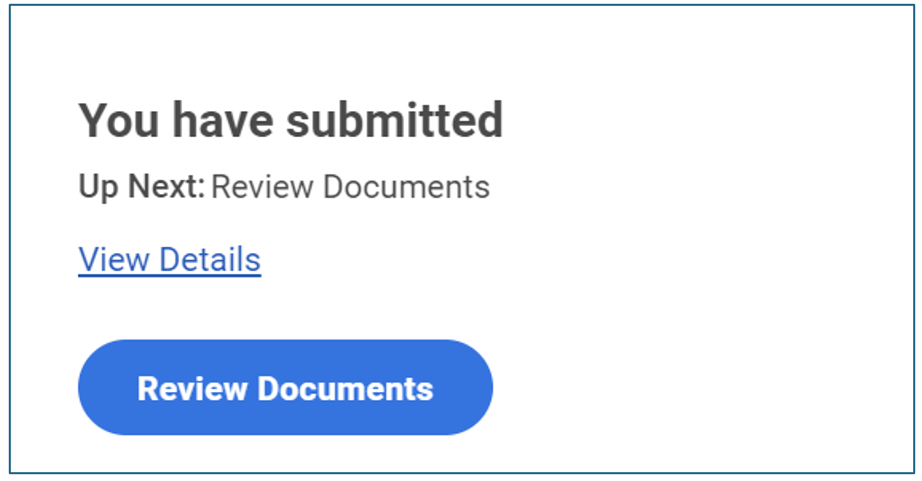
Once you are completed, click Submit.
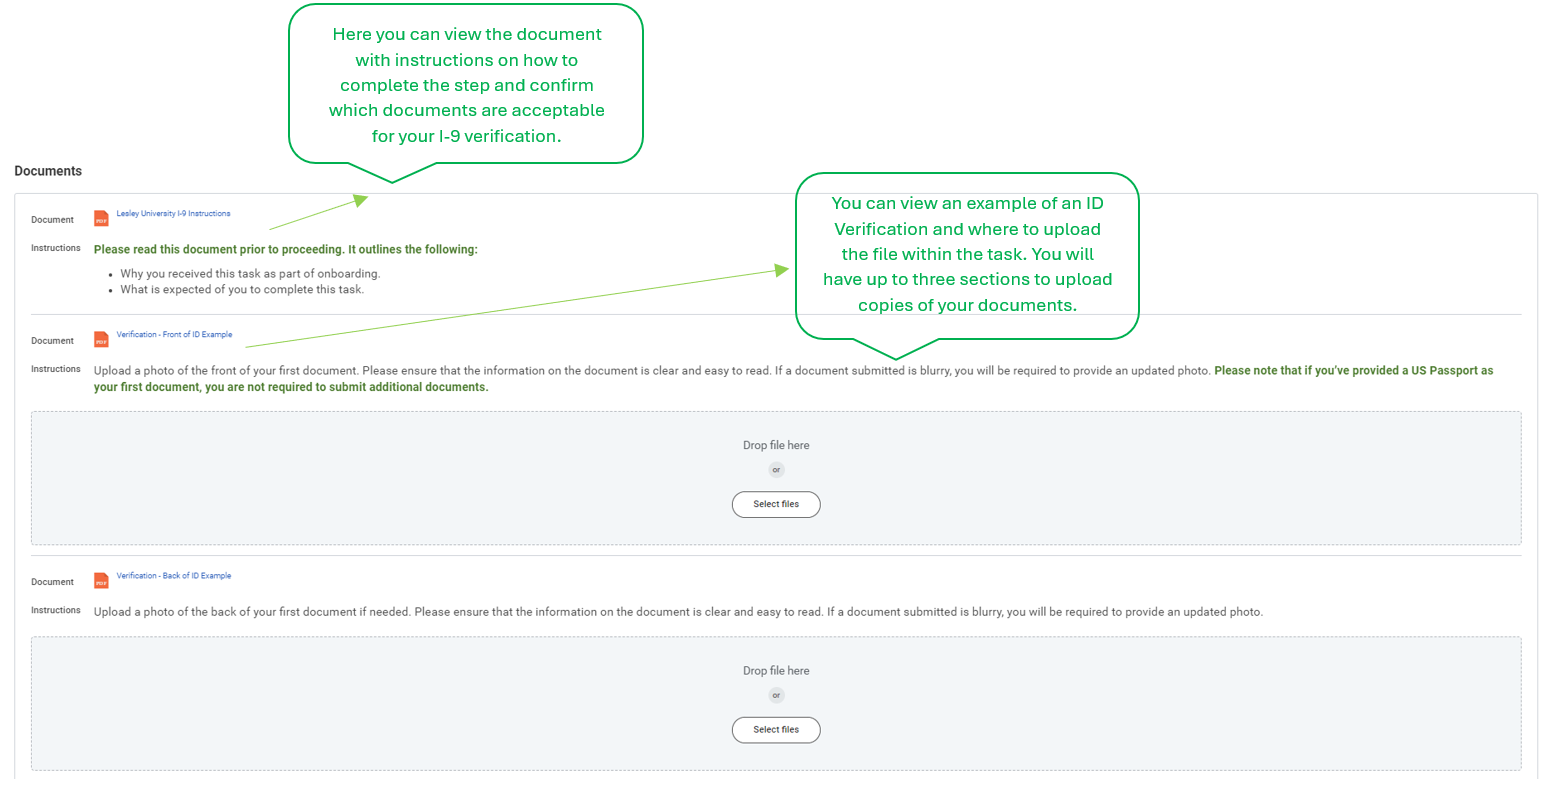
You will receive a pop-up asking to upload supporting documents labeled as Review Documents. Here you will be asked to upload your I-9 verification documents.
Within the task are instructions and help text available to help you know which documents you will need and how to upload them into Workday.