Add Media to Your myLesley Course via Video Studio
TABLE OF CONTENTS
- What is Video Studio?
- Supported Formats and Limits
- Add Media in Your myLesley/Blackboard Course
- Record Video with Video Studio
What is Video Studio?
Video Studio is Blackboard's built-in audio and video tool that lets you create, share, and engage with media directly within your myLesley/Blackboard courses. Whether you're recording a lecture, posting an announcement, providing personalized feedback, creating a presentation, or submitting a video assignment, Video Studio makes it easy to upload media or create a recording using your camera, microphone, screen, or any combination of the three.
Supported Formats and Limits
For the best experience with Video Studio, review the following requirements, supported formats, and usage limits.
Supported Upload Formats
- Video: .mp4, .mov, .avi, .mkv, .wmv, .flv, .webm, .3gp, .m4v, .mpg, .mpeg, .m2v, .ts
- Audio: .mp3, .m4a, .wav, .ogg, .flac, .opus, .weba, .aac
- Maximum file size: 10 GB.
Recording Duration
- Record up to 30 minutes of audio/video at a time.
Playback and Streaming Quality
- Videos can be played back in HD (1080p, 8 Mbps) or SD (480p, 1 Mbps) quality.
- Video quality automatically adjusts based on the viewer's internet connection to provide the best playback experience.
Add Media in Your myLesley/Blackboard Course
You may use Video Studio to upload media (video and audio) you have already created or use Video Studio to record new media from your webcam and/or screen.
Launch Video Studio
Launch Video Studio from the Text/Content Editor (Instructors and Students)
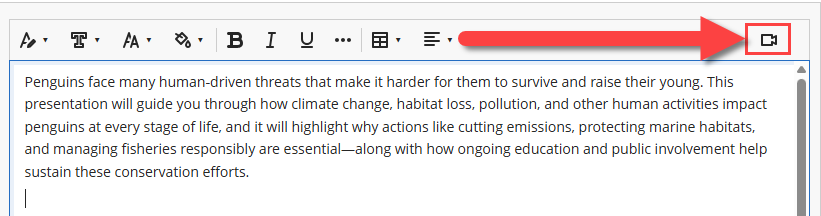
Both instructors and students can add Video Studio content anywhere the text/content editor is available, including Announcements, Assignments, Discussions, Journals, and more. Navigate to where you want to add media, then click the Audio/Video button in the content editor.
Launch Video Studio from the Course Content Page (Instructors Only)
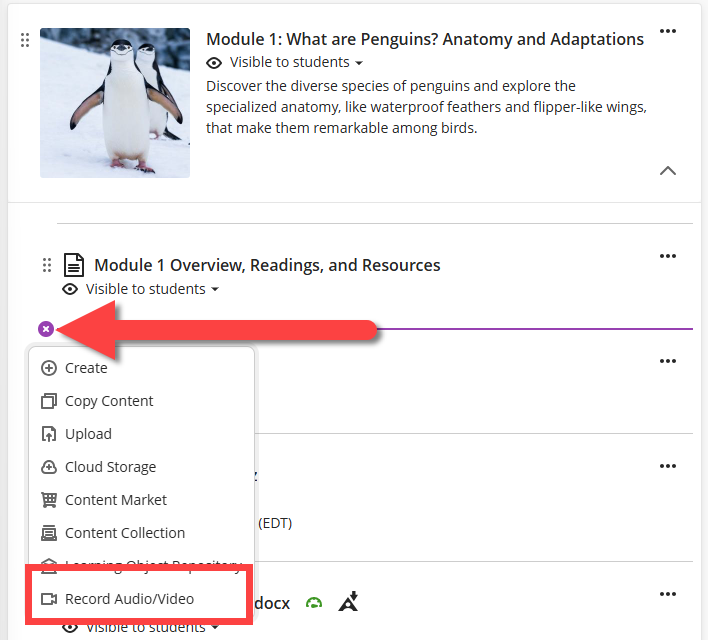
Instructors can add Video Studio content directly to the Course Content page (or within a Learning Module or Folder).
Navigate to where you want to add media, then click the + button to open a menu. Select Record Audio/Video.
Launch Video Studio in an Ultra Document (Instructors Only)
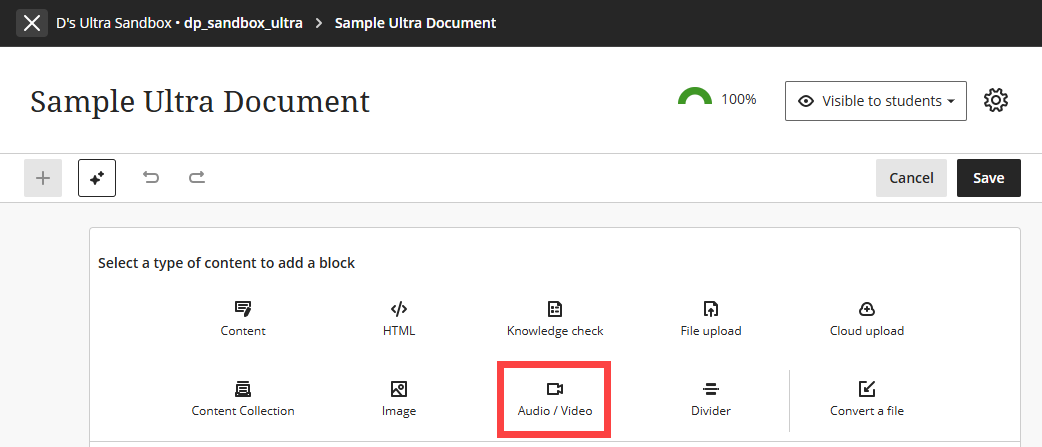
Instructors can add Video Studio content to an Ultra Document by selecting the Audio/Video block type. Refer to the Create and Manage Ultra Documents support article for more information.
Select Whether to Record or Upload Media
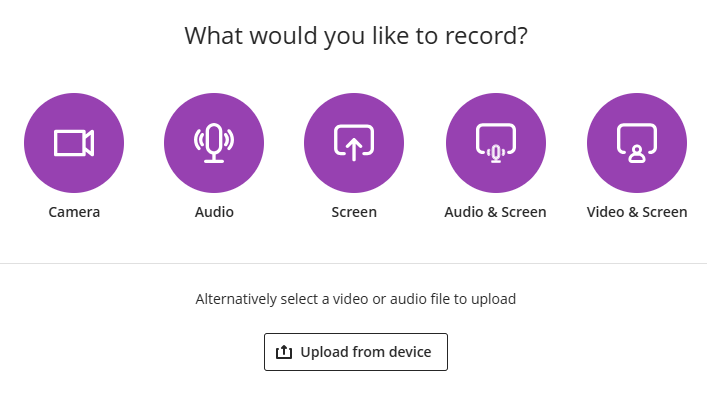
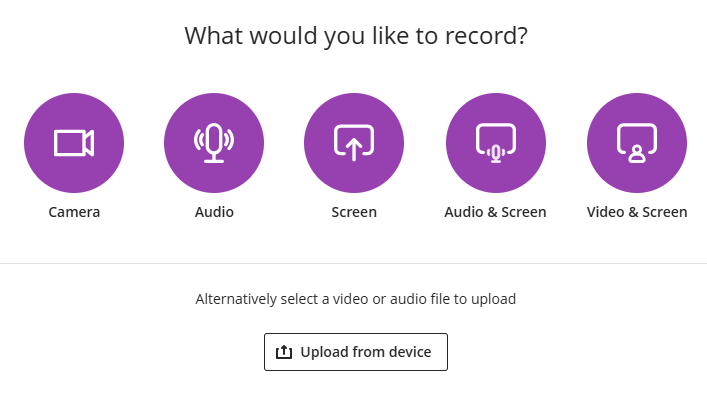
When you launch Video Studio, you will be prompted to select what you would like to record:
- Camera: Records your camera and microphone.
- Audio: Records only your microphone.
- Screen: Records only your screen.
- Audio & Screen: Records your screen and microphone.
- Video & Screen: Records your screen, camera, and microphone simultaneously.
Or select Upload from Device to upload media from your computer or mobile device.
Edit Media Details
Once you have recorded or uploaded your media you will be prompted to edit the media details including the Title, Description and, if available, Access Options. Once you have finished, click Save.
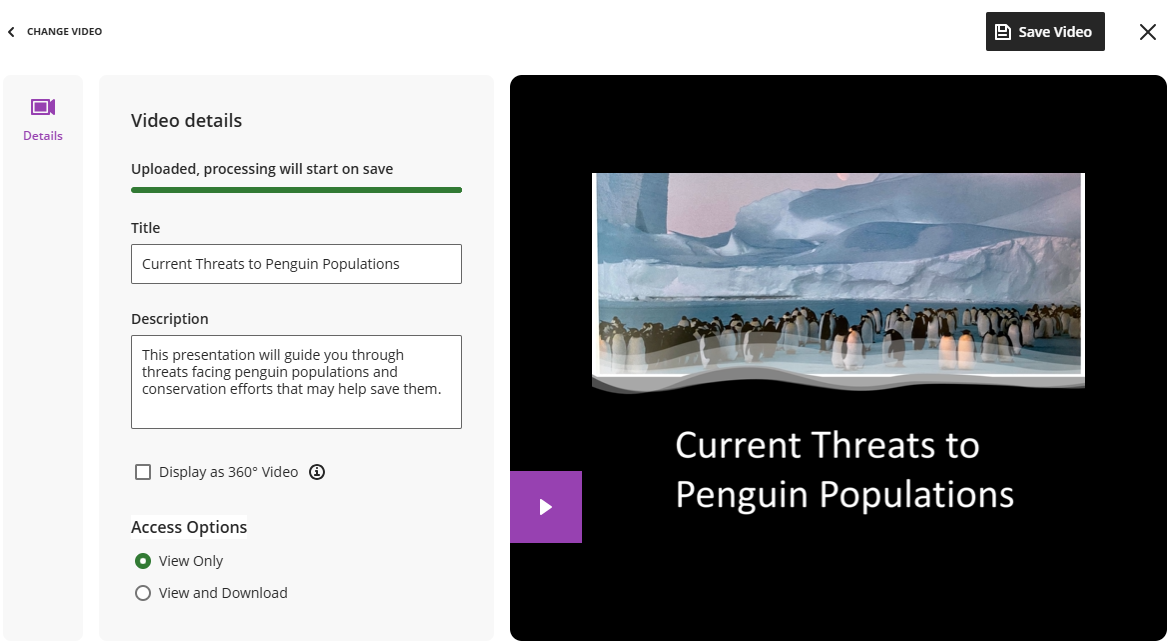
Once your media processes, a transcript and captions will be created automatically. You may go back and edit your media to update/edit your transcript and captions for accuracy.
Record Video with Video Studio
You may use Video Studio to record any combination of your camera, microphone, and screen. When you launch the tool, you will be prompted to select what you would like to record.
- Camera: Records your camera and microphone.
- Audio: Records only your microphone.
- Screen: Records only your screen.
- Audio & Screen: Records your screen and microphone.
- Video & Screen: Records your screen, camera, and microphone simultaneously.
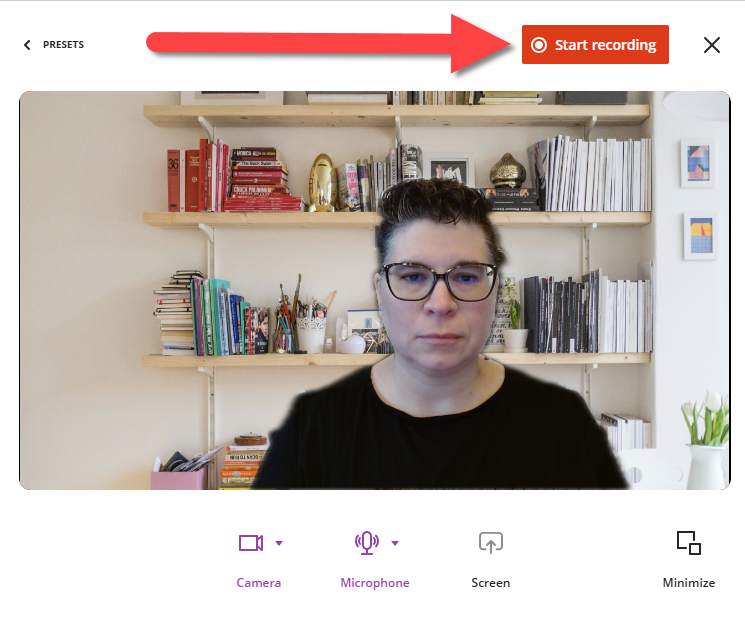
Once Video Studio launches, select the dropdown menu options for camera, microphone, and screen to choose from any connected devices.
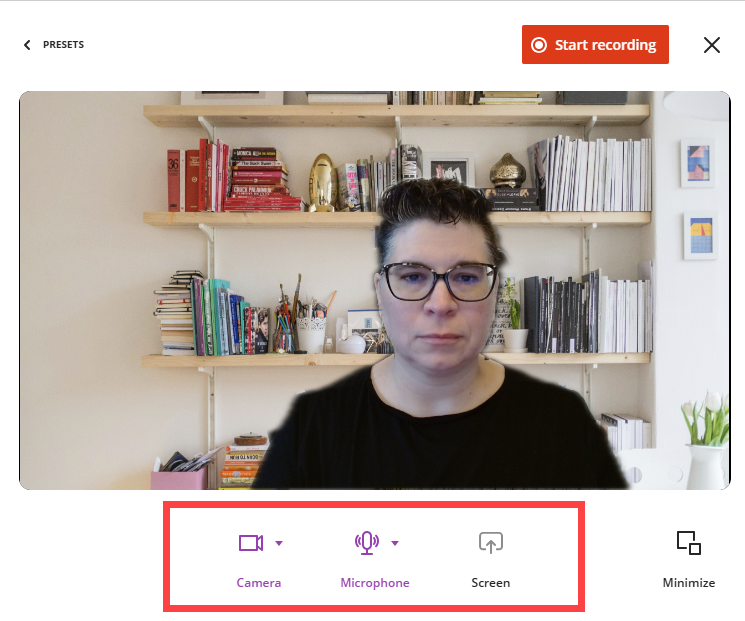
Select the device you would like to use to record video or audio.
- If you are recording your camera, you may customize your recording background by blurring or uploading a background image.
- If you are recording your screen, you will be prompted to select which screen to record.
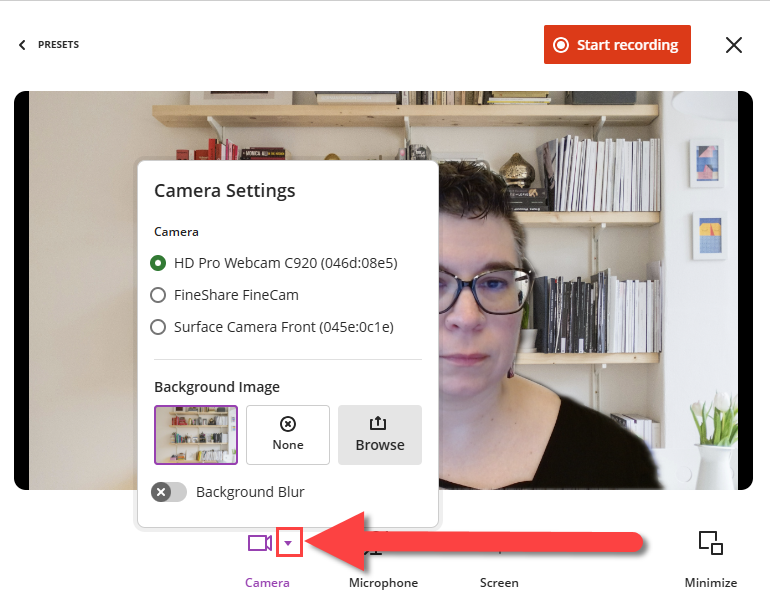
Once you are ready to record, click the Start Recording button. There is a three second countdown before recording begins.
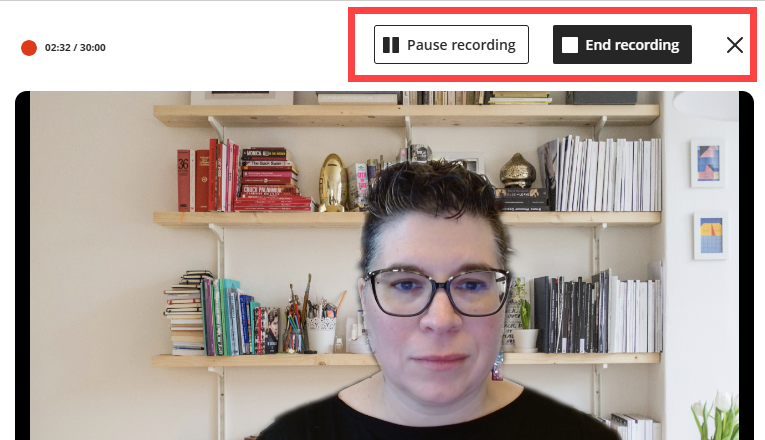
You may pause, resume, or end the recording as needed. Or click the X to cancel and rerecord.
Once you end the recording, your media will upload and process. During this time you can preview your media, edit the title, and add a description. Click Save Video to save your video and add it to your course. You may also click the X to delete your recording or select Retake Recording to rerecord.
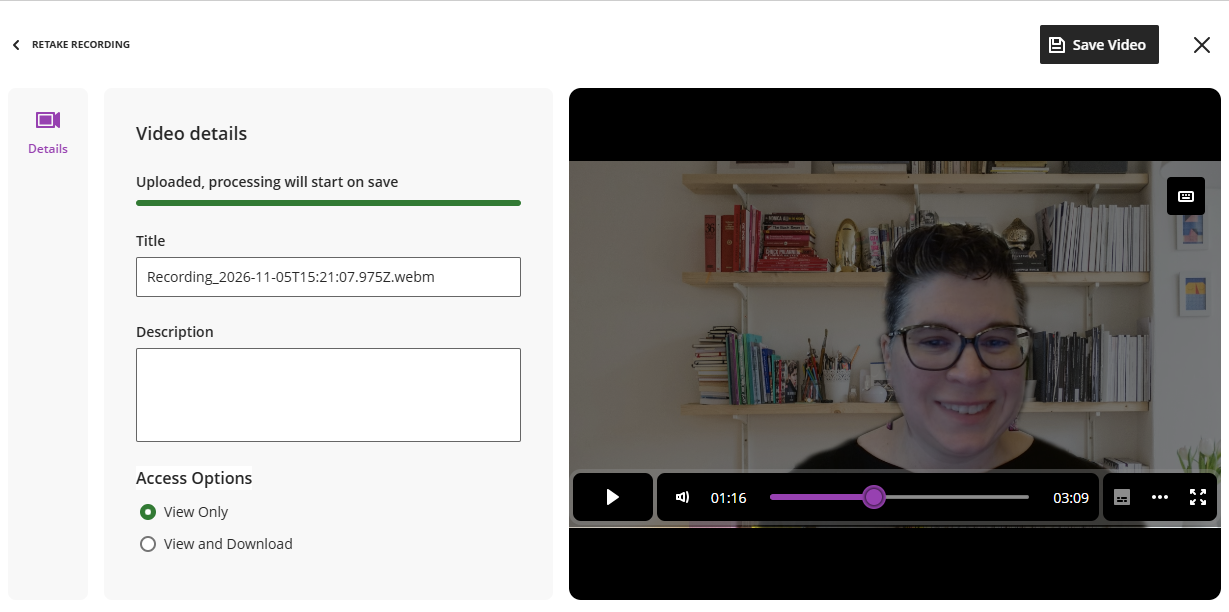
Once your media processes, a transcript and captions will be created automatically. You may go back and edit your media to update/edit your transcript and captions for accuracy.