TABLE OF CONTENTS
- About Course/Organization Size Limits
- Manage Media (Audio and Video files)
- Manage Zoom Recordings
- Manage Your Course/Organization Files
- Tips for Reducing File Size
About Course/Organization Size Limits
By default myLesley courses have a 5 GB size limit and organizatiions have a 50 MB size limit. Once you have reached the maximum size limit you will no longer be able to upload or attach files. This will not affect your students' or community members' ability to post content.This article will walk you through best practices for managing your course/organization files and provide some tips for reducing your file's size before uploading to myLesley.
Manage Media (Audio and Video files)
Media files tend to have a large file size and can quickly cause you to hit your course/organization size quota. As a best practice, you should not upload media (video or audio) files directly into myLesley, as this can cause a multitude of issues including:- Compatibility: Whichever format you use for your media is the format that your audience will have to view, regardless of their device or browser. This can cause compatibility and playback issues.
- Accessibility: Media uploaded directly into myLesley will not be captioned, leading to issues with accessibility.
- File Size: Uploading large files into your course/organization requires users to then download large files, which may be a strain on their system. Additionally, media files tend to be very large will contribute to the overall size of your course.
- Privacy and Security: Media files can be downloaded and shared, leading to potential security and privacy concerns.
Media You Created
If you have created media content, or will be creating your media content, we recommend uploading your content to myLesley by using Kaltura Media. Kaltura provides a lot of advantages, both to you and your users, including:- Compatibility: Kaltura will accept a large amount of media types and automatically convert it to versions your users can view, regardless of their device.
- Accessibility: Kaltura will automatically caption your media content and provide a transcript. Accurate captioning of audio and video content ensures that people who are Deaf and hard of hearing can understand your content. Additionally, captions and transcripts are very useful to non-native English speakers, viewers watching in a sound-sensitive environment such as a library, can help viewers with learning disabilities or attention deficits maintain concentration, and can help all learners improve comprehension.
- File Size: Users do not have to download content. Instead, the media is hosted on Kaltura's servers and streams through myLesley. Additionally, uploading your media to Kaltura does not impact your overall course size.
- Privacy and Security: Kaltura media cannot be downloaded by anyone who is not the owner, nor can they be shared on other websites.
You may use Kaltura to upload media you have already created or record a new video from your webcam or by recording your screen. Instructions for using Kaltura may be found here:
Media created by others
If you are not the creator of the media or do not have permissions from the publisher, you cannot upload the media into your course. This includes copies of DVDs that you have purchased. If the content exists on the web (ex YouTube, Vimeo, PBS, library media databases), you may either link to it, or embed it anywhere you see the text/content editor (ex Ultra Documents, Assignments, Discussions, etc.).
For more information, refer to the Create and Manage Course Content: Media Created by Others support article.
Have questions about fair use and copyright? Reach out to a librarian: asklib@lesley.edu!
Manage Your Media in myLesley
For more information about managing your media content in myLesley, refer to the Managing Media in myLesley support article.
Manage Zoom Recordings
The best way to share your Zoom recording depends on how you recorded your meeting and how you want/need to share these recordings. Refer to the Zoom: Getting Started with Recording support article for more information.
Link to Zoom Cloud Recordings
If you recorded your Zoom meeting in the cloud, post a link to the recording in your myLesley course.
There is a 6 month retention period for Zoom recordings. If you need to allow access after 6 months, please use a different sharing option. Refer to the Zoom Cloud Storage Retention support article for more information.
Upload Your Zoom Recording to myLesley via Kaltura Media
If you recorded your Zoom meeting locally (to your computer), upload your recording to myLesley via Kaltura Media. Please note that others cannot download your Kaltura Media content.
Manage Your Course/Organization Files
All files (documents, PDFs, images, etc.) that you upload into myLesley are stored in your Course or Organization's Content Collection and contribute to the overall size of your course.
Whenever possible, we recommend that you:
- Link to online resources and library content.
- Reuse files from your Content Collection.
- Delete unnecessary or outdated files.
Link to Online Resources and Library Resources
Link to content that you find online (including journal articles and library resources). Linking to online resources ensures that your users are seeing the most up-to-date version of the content. Additionally, it helps to drive additional traffic to the site and increases the number of views, letting the owner know that the content is being used.
Downloading files, journal articles, and library resources and then uploading them to your course may be a violation of copyright and fair use.

Need help finding online resources? Have questions about fair use and copyright? Reach out to a librarian: asklib@lesley.edu!
For more information and detailed instructions, refer to:
- Create and Manage Course Content: Link to Online Resources support article
- Guide: How to Link to Library Content
Reuse Files
Are you using the same file or image multiple times in your course/organization? Instead of uploading the same file multiple times, upload it once and then link to the item in the Content Collection.
From your Course/Organization Content area or from within a Learning Module or Folder, click on the + button and select Content Collection.

Or, from within an Ultra Document, click the Insert Content (+) button and then select Content Collection.

This will bring you to your Content Collection. You may browse your files or use the Search feature to find your desired file. Select your file and click Submit.

Your file will be added to your desired location.
Replace/Overwrite Files
Do you need to make changes to your file? Instead of re-uploading your file (and creating duplicate copies in the Content Collection), replace or overwrite your file. This will replace the file in your content area as well as in the Content Collection.
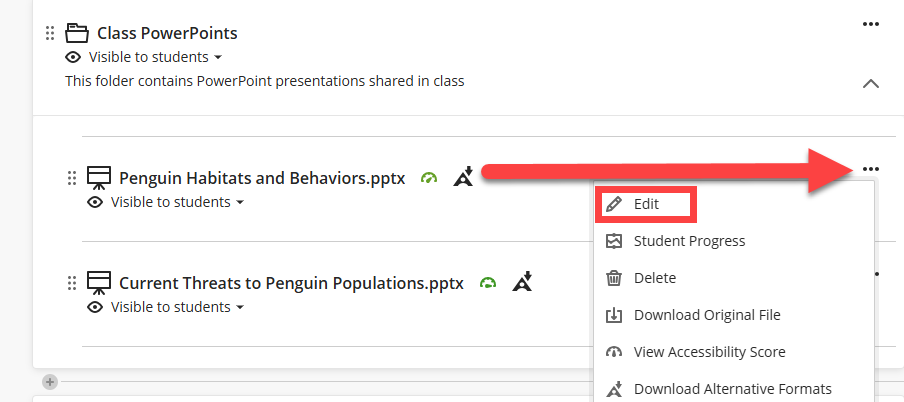
Locate your file and select the More Options (...) button to open a menu. Select Edit.
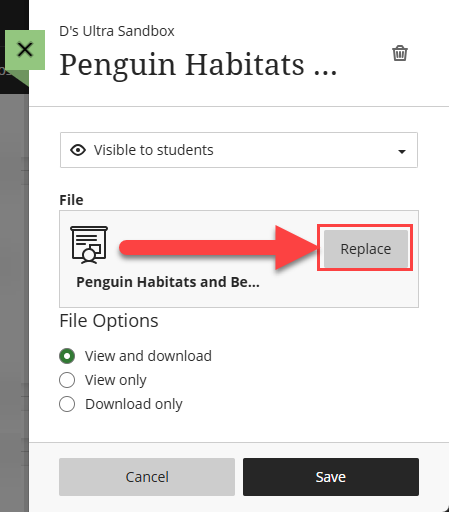
This will open a panel. Click the Replace button to replace your file.
If the file is being displayed in multiple locations in the course, a prompt asks if you wish to replace the file in all instances or this single instance.
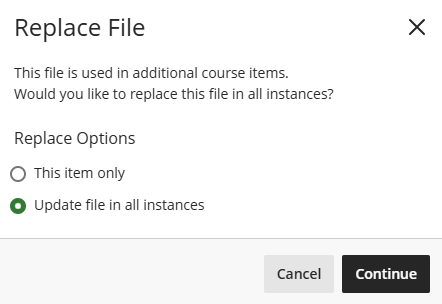
Your old file will be deleted and replaced with the new file.
Delete Files
Delete old or outdated files to reduce the overall file size in your course/organization. You may delete files individually or in bulk.
Delete Individual Files
To delete items on your Course Content page, click the More Options (...) button. This will open a menu. Select Delete.

A warning message will pop up to let you know that your content will be permanently deleted. If you delete a Learning Module or Folder, all of the content within it will be deleted as well. Click Delete to delete.

Use Batch Edit to Delete Multiple Files
You can use the Batch Edit tool to update common settings across your content (including visibility and due dates) or delete a multiple items at once.
On the Course Content page, click on the Options (...) menu and select Batch Edit.

This will bring you to the Batch Edit page. Click the check box next to the items you want to delete. You can choose individual items or entire Folders or Learning Modules. If you select an entire Folder or Learning Module, all items within it will also be selected. You may click to open a Folder or Learning Module in order to select individual items within it.
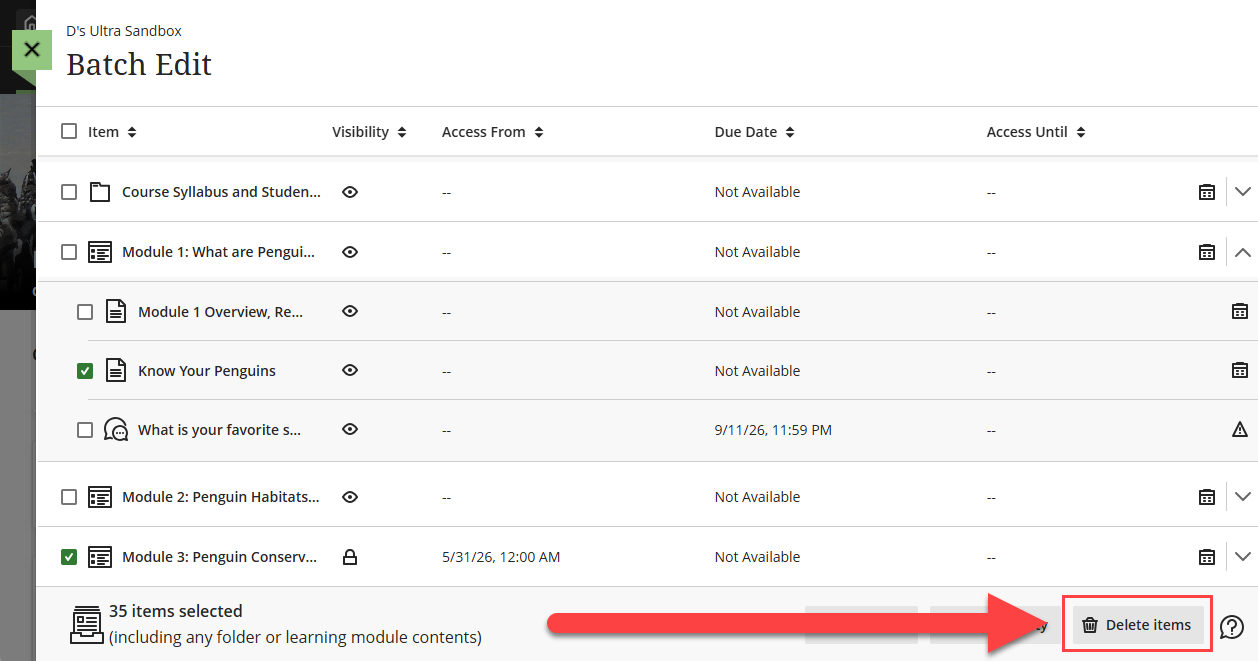
Once you have selected your items click Delete Items to delete all of the selected items.
Delete Unused Files
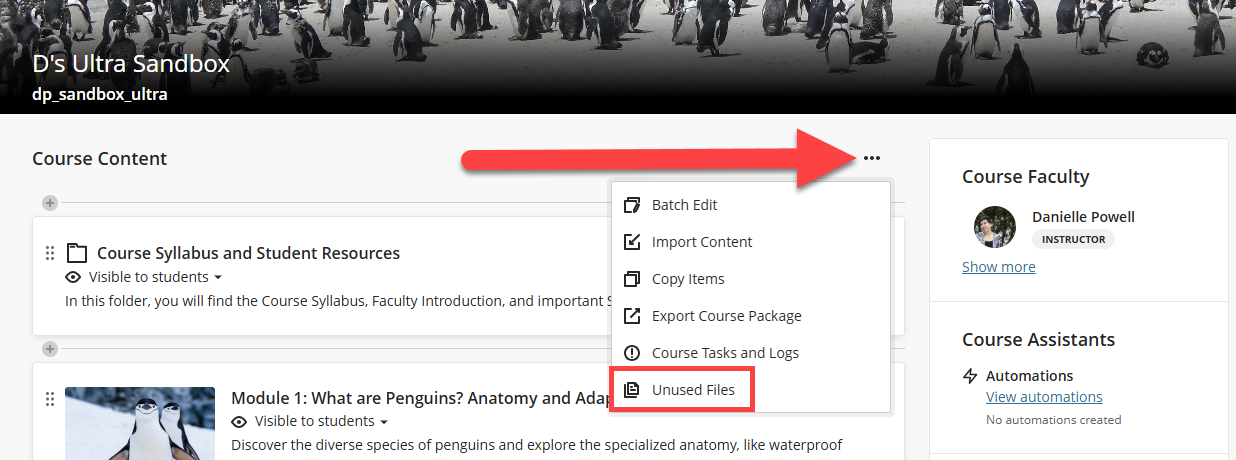
Use the Unused Files tool to easily locate and delete unused files in your course. On the Course Content page, click on the Options (...) menu and select Unused Files.
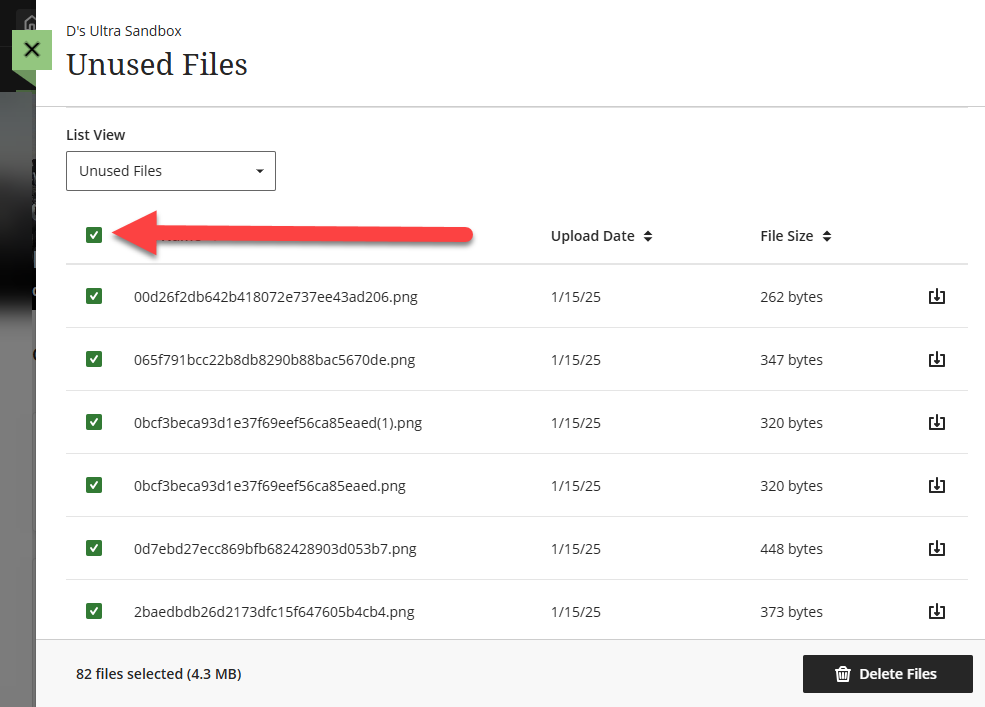
This will bring up a list of all files that are not currently linked to content in your course. Select the files you want to remove or click the Select All option to select all files. Click Delete Files to permanently delete your unused files.
Tips for Reducing File Size
We recommend minimizing your file size before to uploading your content to myLesley. This will help keep your course/organization size low from the start. Reducing your file size is also helpful to your users, as downloading large files can be time consuming and take up a lot of space on their hard drive.Documents (Microsoft Word)
On their own, Word documents are typically not large files. However, once you start adding images the file size increases dramatically. Before uploading your document into myLesley, reduce your file size by compressing your images:PDFs
PDFs can be optimized to reduce file size by compressing images and flattening objects. If you have a large PDF, optimize it before uploading it into myLesley:Presentations (PowerPoint)
Does your PowerPoint have a lot of images or media files? These may be contributing to your overall file size. Before uploading your presentation into myLesley, reduce your file size by compressing your images and media files:
If you created a narrated PowerPoint, save your file as a video and upload it to Kaltura. This will ensure that your video is easily viewable by your users, whether or not they have PowerPoint installed on their devices.
Images
If you uploaded your image from a camera or mobile device, resize your image and reduce its file size before you upload it to myLesley. The tool you use may vary based on your device and available apps/software.
Was this article helpful?
That’s Great!
Thank you for your feedback
Sorry! We couldn't be helpful
Thank you for your feedback
Feedback sent
We appreciate your effort and will try to fix the article